Roti

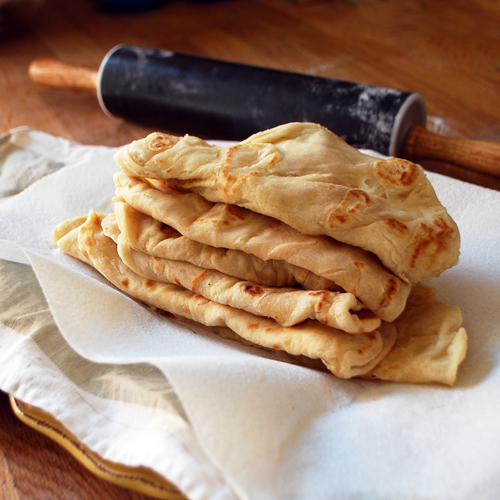
Stack of Fresh Roti
Roti Step by Step Instructions Fresh soft and delicious roti (“rho-tee”), a bread accompaniment for various spicy Indian curries and sweet puddings (see my last post of Halwa pudding). This roti bread was taught to me by my mother in law, shown to me, not given a written recipe with measurements (I wonder if she even owns measuring cups!), oh no no… mom eyeballs the amounts and can tell by the texture if its the right amount. She does everything by heart and with heart. Mom has been making this for years and is probably finding this post rather amusing!

This particular way of making Roti results in a very soft and pliable bread, so its great for using in lieu of a spoon. Since I didn’t grow up eating roti and curries, I have had to practice this recipe over and over again and record my measurements. My husband thinks I finally got it right. So here it is…

Recipe: Roti

Summary: Guyanese Style

Ingredients

  • 2 cups All-purpose flour
  • 1 TBSP Baking Powder
  • 1 cup water
  • dash of salt
  • vegetable oil for brushing (about 1/4 cup)

Instructions

  1. Mix the dry ingredients together in a large bowl. Add water slowly and roll the flour onto the water to avoid your fingers sticking too much. Mix with your hands until its all combined and slightly sticky. Keep kneading away at it for a few minutes.
  2. Add a little extra flour to the bowl and roll the dough ball to make it nice and soft. Leave in the bowl and cover with a damp towel for at least 30 to 45 minutes.
  3. Break the dough into golf ball sized pieces (I usually make about 7).
  4. Now look at my pictures to help you… take a ball and:
    – roll it out (try to use as little flour as possible, more flour = tougher bread)
    – brush top side with a little oil
    – fold “brochure like” with each side toward the middle. Next, fold the same way but with the bottom up, then top down. You should have a little folded square (oiled side tucked inside, soft on outside).
    – repeat this for all balls.
    – Let them sit another 30 minutes.
  5. Prepare your workspace by spreading out a kitchen towel onto the counter. Place a paper towel onto that. (This is where you will be “smushing” the roti.)
  6. Heat a skillet to medium high, brush with oil. Now roll out a ball dough into a round circle. Toss the roti on the skillet, wait for it to bubble (1-2 minutes), brush the top with oil then flip it. Brush the new top with oil (the already cooked side) and flip again. Wait about 10 seconds then remove from the skillet and place onto the prepared paper towel. Fold the towel in half, then hold accordion like and smush together several times (like 20 times). Roti should be soft and floppy. Place on a plate and cover to keep warm. Repeat for all.

Preparation/Rising time: 60 minute(s)

Cooking time: 15 minute(s)

Number of servings (yield): 7

Blueberry Bumplings

Dr. Seuss inspired... Blueberry Bumplings
Donuts, dumplings, blueberry bumplings, chocolate mush-mush, super sweet.
Clam stew, ham stew, watermelon wush wush, Oh, the stuff that I could eat!

From The Cat in the Hat Songbook

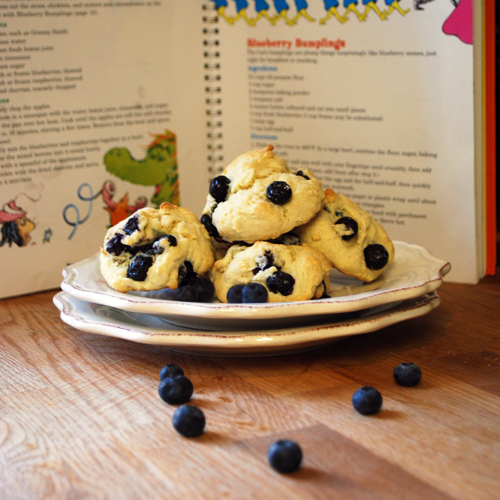
Start your day the Dr. Seuss way! All you little ducklings, have some blueberry bumplings, for breakfast or snack, to give you that perfect quack. I checked out the Green Eggs and Ham Cookbook from the library and we had a great time testing out some of the recipes. If you haven’t heard of this cookbook, its a perfect one for cooking with kids and all the recipes are based on a Dr. Seuss excerpt.
Blueberry Bumplings cut outs Dr. Seuss inspired... Blueberry Bumplings Dr. Seuss inspired... Blueberry Bumplings
Blueberry Bumplings is probably our favorite recipe in the book, its become a staple in our home. We like to make them for our weekend breakfast. They taste similar to scones and are very airy and they are the best when the blueberries are still warm and gooey. One change I made, and would recommend: triple the amount of blueberries. The original calls for only 1/2 cup. We use 1 1/2 cups because the blueberries are the best part and we want at least one in every bite.

Recipe: Blueberry Bumplings

Summary: Adapted from the Green Eggs and Ham Cookbook by Georgeanne Brennan

Ingredients

  • 2 1/4 cup all-purpose flour
  • 1/3 cup sugar
  • 2 tsp baking powder
  • 1/4 tsp salt
  • 1 stick butter softened (1/2 cup)
  • 1 1/2 cup fresh or frozen blueberries
  • 1 large egg
  • 3/4 cup half-and-half

Instructions

  1. Preheat oven to 400F. Prepare cookie sheets with parchment paper.
  2. In a large bowl, combine flour, sugar, baking powder, and salt.
  3. Add butter and mix with fingertips until crumbly.
  4. In a separate small bowl, whisk egg and half-and-half. Quickly pour into the dry mixture and stir to combine, but don’t overwork. Then stir in your blueberries.
  5. Now you can either just lump them by the spoonful onto prepared baking sheets, or cut them into shapes. To do the shapes: lay the dough between 2 wax paper sheets ( I used flour on top the wax paper to help from sticking). pat down to about 1/2 inch thick. Remove top wax paper and use cookie cutters to cut out shapes.
  6. Place on prepared cookie sheets.
  7. Bake in oven for about 10 minutes until golden on top.

Preparation time: 15 minute(s)

Cooking time: 10 minute(s)

Number of servings (yield): 12

Sunflower Bread

Sunflower Shaped Sweet Bread
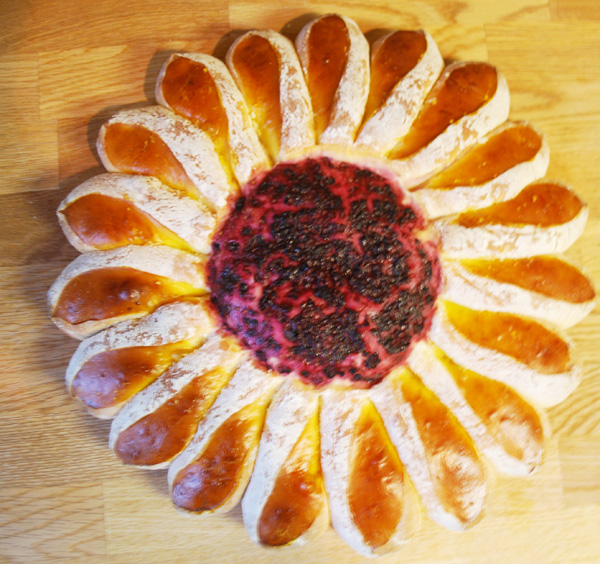
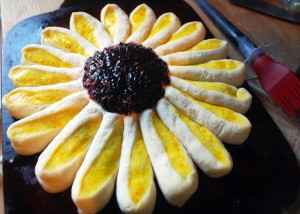
When I saw this beautiful bread on Chef Tess’s blog, I had to try it for myself. I mean, what a creative way to bring major attention to your average dinner roll. I can just picture this at a summer picnic, or even a formal dinner party. Instead of passing a basket of rolls around, have each guest grab a petal!

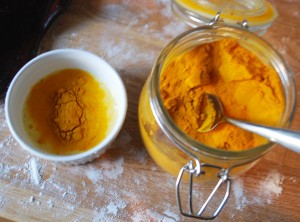
I picked out a simple sweet bread recipe that I have used several times in the past with great success. For decorating, I used a turmeric powder to make the dye and crushed blackberries for the center. The blackberries were tasty on the sweet bread, but I think you could use chocolate chips, some variety of seeds, or maybe another dye made from cocoa powder for the center. If you have suggestions, please leave a comment, I would love to hear your ideas!

So the question is… was it a difficult process? I thought it would be but it was actually quite simple. Aside from the dough rising and baking time, it took about 20 minutes to form and “color” the flower, and I had a lot of fun doing it!

He loves me, he loves me not, he loves me!

He loves me, he loves me not, he loves me!

Sunflower Bread Preparation Step 1

Sunflower Bread Preparation Step 1


Sunflower Bread Preparation Step 2

Sunflower Bread Preparation Step 2


Petal Dye

Petal Dye


Sunflower Bread Prebaked

Sunflower Bread Prebaked

Sweet Bread Recipe

Taken from All Recipes

  • 1 cup warm milk
  • 1 egg
  • 2 tablespoons margarine
  • 1/3 cup white sugar
  • 3/4 teaspoon salt
  • 3 cups bread flour
  • 2 1/2 teaspoons active dry yeast

Instructions

  • Combine the milk, sugar, and yeast in the bread machine. Let sit for 5-10 minutes until frothy. Add remaining ingredients and start machine on the “dough” setting.
  • Preheat oven to 350F
  • Place dough on floured surface. Roll it into a nice soft ball.
  • Transfer to a greased baking sheet or baking stone, flatten into a circle.
  • Place a small dish or cleaned out jar upside down in the center of the circle. I used a small ramekin.
  • Lightly brush or mist dough with olive oil.
  • Sprinkle flour over the exposed dough.
  • Remove the dish or jar.
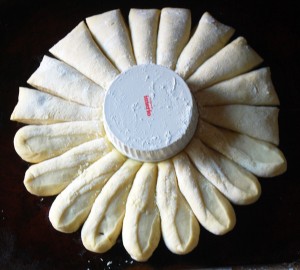
  • Using a knife, cut your petals about 3/4 of an inch. Then Gently lift and slightly pull out the petal, then turn it to the side. Do this for all petals and adjust them lengthwise so they match.
  • Next make the dye for the petals: crack one egg in a small dish, mix in turmeric (or curry powder) little by little until you get the color you like.
  • Use a new paintbrush to brush on the dye for each petal.
  • In a small dish, crush blackberries. Gently spoon them into the center.
  • Bake for 25-30 minutes, until golden brown.

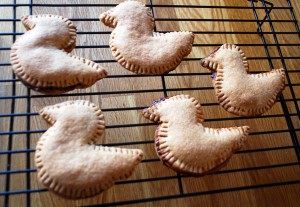
Ducky Pop Tarts

Ducky Pop Tarts

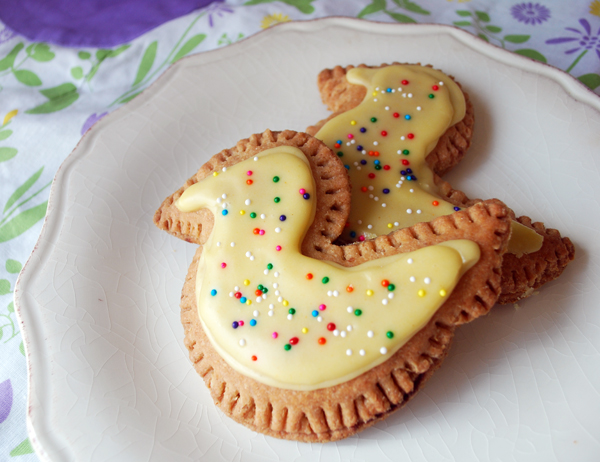
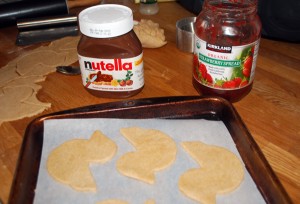
There seems to be a huge home made pop tart trend out there in the blogosphere of foodies. When I saw that someone had made them with nutella, I was sold. My husband loves nutella… his favorite: a small spoonful on top vanilla ice cream. I was hoping these would be a nice surprise for him to take on the train to work.
Poptart Cutouts

Poptart Cutouts


Just Baked

Just Baked

So I sought out for a good recipe… there are tons out there. But I settled for one on the healthier side since, well, I’m days shy of having baby #2 and my weight gain has been kind of out of control! What with all the donuts, cookies, and cake I have been making lately for the blog… who can blame me?

This recipe uses 100% whole wheat flour, yogurt, butter, and salt. Thats all, pretty simple really. But it was absolutely disgusting. To describe how yucky these duckys were, there are still 2 sitting on the counter in my house and I made them 4 days ago… AND they have frosting on them, AND sprinkles, AND they are filled with nutella!

On a brighter note, they look awfully cute and the frosting was delicious, I made it with powdered sugar whipped up with a little milk (add sparingly until you get the right consistency). Then I actually used turmeric powder to get the yellow color! I couldn’t taste the turmeric, it was a surprisingly good choice, one that I will do again since I understand turmeric has some pretty awesome health benefits.

Continue reading

Related Posts Plugin for WordPress, Blogger...