Strawberry Yogurt Cake Roll

Strawberry Cake Roll We are celebrating over here in the cakestudent household because I got my first product promotion! Yay! Dannon has asked me to sample their new line of Activia Selects French and Greek yogurt. And, boy was I happy to do it!

So, cakestudent fans, I’m excited to announce that you can join us in the celebration… Visit the Activia Selects Facebook page to get your FREE coupon now! Take it with you to any local super market to redeem. Let your friends and family know… the coupons are available only until August 15th… so spread the cheer!
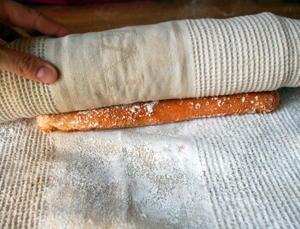
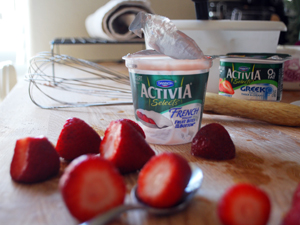
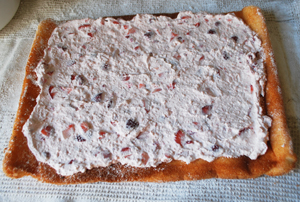
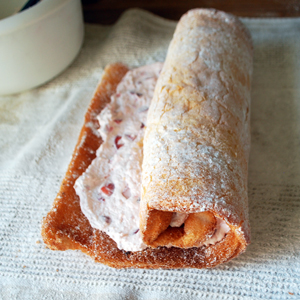
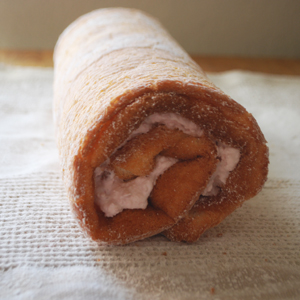
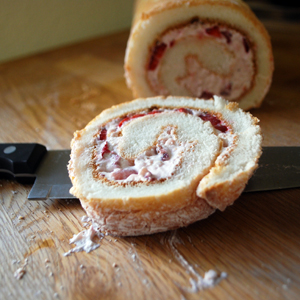
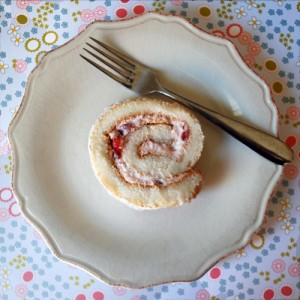
Cake Rolled in Towel Activia Strawberry French Yogurt Unroll, top with filling Roll up with Filling Ready to Freeze Slice of Cake?
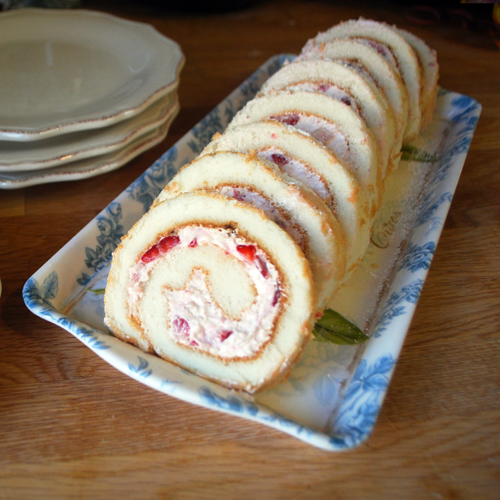
Slice of swirly goodness
The challenge for me… what to make that could showcase this yogurt? Well, usually we just enjoy our yogurt right out of the cup, sometimes dipping fresh strawberries into it. I have also used strawberry yogurt in smoothies, popsicles, baked it in cakes and muffins. But for this task, I decided to go with a recipe that really honors my original intent for this blog… to be a student of cakes. I have never made a roll cake before, and I thought it was a good time to try. The beauty of this recipe is that the yogurt isn’t baked in the batter, but rather its used as a filling after the baking process… so you can really taste the yogurt.

Roll cake, A.K.A swiss roll, A.K.A jelly roll… this cake was thought to be created over a hundred years ago somewhere in central Europe. There must be a reason it’s lasted so long. After creating it in my own kitchen I found out why, it’s really fun to make! The final product is attractive, it was easy to make, cleanup was a breeze, and its a light delicious summer dessert. Since it is set in the freezer, the creamy yogurt filling is very cold and the angel food cake is still soft and airy.

I tested out the Dannon Activia French Strawberry with chunks on the bottom, and Strawberry flavored thick & creamy Greek. Both were good, but if I had to choose my favorite it would have to be the Greek (I really love the creaminess). The chunks of strawberries in the French yogurt lended itself nicely to this cake filling. It was only a 6 oz container, so I added a few spoons of the Greek and also chopped up about 1 cup worth of fresh strawberries and added it to the filling. Then when I finished, I sat back and polished off the Greek yogurt as my reward.

This cake is definitely a keeper, great for a dinner party. It just presents so nicely, and its a very light treat to offer after a full meal. So easy to make you can’t really mess it up. Well, it was almost perfect… I did learn a lesson from my first attempt: when prepping the rolled cake to go into the freezer… you mustn’t wrap with plastic wrap because the golden outer layer will peel off in bits when you take it out to serve. Instead, just keep it in some kind of covered container while its freezing. However this mistake was easily concealed by sifting powdered sugar on the top.

Note: The recipe called for a jelly roll pan, I didn’t know if I had one or not. After some digging on the internet I found out I could use my cookie sheet measuring 15.25 x 10.25 x .75 in. I didn’t use all the cake batter because it wasn’t 1″ deep and I wanted to avoid an overflow. So I filled it to the rim and then put the leftover batter into a muffin tin and made 6 cupcakes.

Recipe: Strawberry Cake Roll

Ingredients

  • 1 (16 oz) box of Angel Food cake mix
  • 5 tsp confectioners sugar
  • 1 (8 oz) non-fat strawberry yogurt
  • 1 (1 oz) package instant sugar free white chocolate pudding mix
  • 2 cups Lite whipped topping

Instructions

  1. Set your oven rack to the lowest level. Preheat the oven to 350C.
  2. Line Jelly Roll pan with waxed paper. Place a clean kitchen towel on your workspace, dust with the confectioner sugar.
  3. Make the Angel Food cake according to package directions.
  4. Pour into the prepared pan and level it with a spatula. Bake for about 15 minutes, or until golden. Let cool for 5 minutes.
  5. Flip cake onto the prepared kitchen towel dusted with the sugar and very gently peel off the waxed paper. Roll up jelly-roll style in the towel, then place the whole thing on a wire rack to cool.
  6. While cooling, whisk the yogurt, the pudding mix in a bowl. Then fold in your whipped topping.
  7. Unroll the cake and spread filling evenly over the cake. Roll it back up (without the towel!). Place it into a covered container and freeze it for at least a few hours. When ready to serve, remove and let thaw for about 30 minutes before slicing.

Preparation time: 20 minute(s)

Cooking time: 15 minute(s)

Number of servings (yield): 8

This sponsorship is brought to you by Activia Selects who we have partnered with for this promotion.
FREE coupon offer good 8/3 /11 – 8/15/11, up to 1 million coupons, on any Activia Selects Single Serve, up to $3.00. One coupon per household. Offer valid in the U.S only. VOID IN LA, NJ, CA. Coupon valid until 8/15/11.
Residents of LA, NJ, CA will be given a ‘$1 off 3 Activia Selects’ coupon.

Snick-a-tella Ice Cream Cake

Snick-a-tella Ice Cream Cake
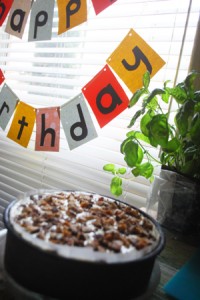
Ice Cream Birthday Party
My hubby is celebrating his 35th birthday this year, the 10th one that we have celebrated together! Thinking back, I have made various cakes or desserts for him and sometimes we just went out to a nice restaurant… but I really haven’t done anything memorable. So this year I wanted to actually create a cake specially for him.

My husband isn’t a picky eater by any means, he always eats what I make for him and when I ask what he thinks, his response ranges from a “Eh” grunt, to “its ok”, and on rare occasions I get the very firm “its a keeper”. I know its really bad when he leaves his seat to fetch his mom’s homemade hot chili sauce. What I’m trying to say is that although not a picky eater, he definitely knows what he likes. When it comes to desserts I know exactly what his favorite things are, and I put them all together to make this cake.

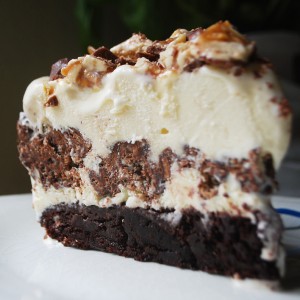
Snick-a-tella Ice Cream Cake
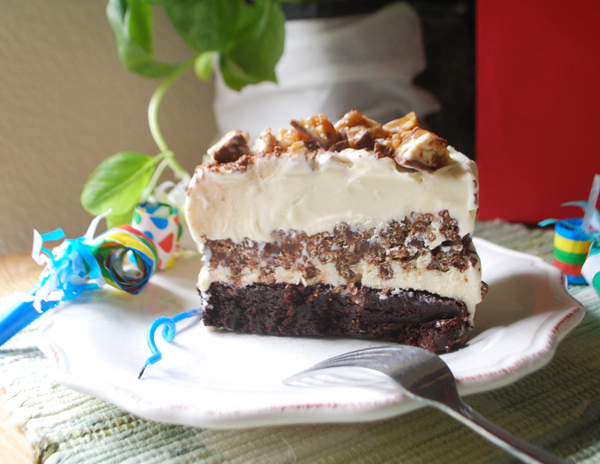
Layer 1: Had to be brownies, dark chocolate variety. I know because the few times when we have gone a to a buffet, he is always excited to end the meal with frozen yogurt over a brownie. I used Trader Joe’s Guilt Free brownies, they only require 1 cup yogurt, and bakes in 20 minutes.

Layer 2 & 4: Had to be Vanilla Ice Cream, ONLY the kind from Costco… Kirkland Signature Super Premium Vanilla Ice Cream.

Layer 3: Had to be nutella, he got hooked on this stuff when we lived in Switzerland for a year (one of our more adventurous “before kids” move.) This was turned into a crispy layer using a crispy rice cereal.

Layer 5: Snickers, his favorite candy bar.

The end result is something I like to call Snick-a-tella ice cream cake. Wow is it delicious! When my husband took a bite, he declared his love for this new creation and told me he wants this to be his official birthday cake. It lasted us a full week and every night, after the kids went to bed, we looked forward to grabbing another slice from the freezer. I’m so sad its gone.

Note – I have to admit, the rice crispy nutella middle was so easy to bite through and had a lovely crunchy texture, but it was oddly difficult to fork. I think adding more cereal to the mix might make this easier.

Recipe: Snick-a-tella Ice Cream Cake

Summary: Snickers and Nutella are the highlights of this cool creamy dessert.

Snick-a-tella Ice Cream Cake

Ingredients

  • 1 prepared pan of Brownies (in a 9″ spring form pan)
  • 1 half gallon Vanilla Ice Cream
  • 1/2 cup Nutella
  • 2+ cups Rice Crispies Cereal
  • 4 1 oz cubes semi-sweet baking chocolate
  • 4 Tbsp Unsalted Butter
  • 2 Snickers Bars

Instructions

  1. In a springform pan, bake 1 package of brownies. Let Cool.
  2. Set the container of Vanilla Ice Cream sit out at room temperature. You can speed this process up by using the warm function in the microwave.
  3. Scoop out the ice cream into a large bowl. Stir. Should be a nice easy consistency for spreading (still thick but soft).
  4. Stick pieces of parchment paper along the sides of the brownie pan.
  5. Spread HALF the ice cream onto the brownie layer. Freeze for about 30 minutes, or until hardened. Keep the remaining ice cream in the freezer or refrigerator.
  6. Meanwhile, in a microwavable bowl, melt the cubes of chocolate per package directions. Stir in the butter, nutella and then the crispy cereal.
  7. When ice cream layer is hardened, spread the nutella mixture on top of it. Then re-stir and spread the other half of ice cream.
  8. Chop up the snickers bars into small chunks. Sprinkle on top the cake. Freeze for about 5 hours.

Preparation time: 1 hour(s)

Star Spangled Strawberries

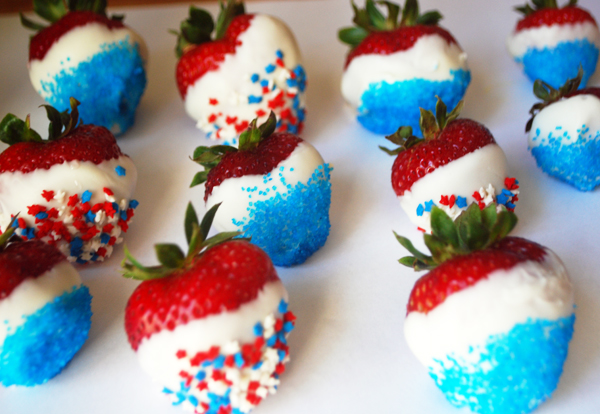
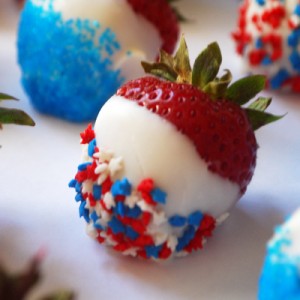
4th of July Chocolate Strawberries

If you read my last post about Jell-o, you will know that we are going on a picnic this weekend to celebrate the 4th of July. I decided last minute to add another dessert, umm… I mean fruit, to our basket. So here they are… sweet strawberries with a little patriotic flair. These were fun to make with my 3 year old, he sat there and narrated everything I was doing “Now dipping into the chocolate!” “Now dipping into the blue stuff!” “Now it goes into my mouth!” He only got one for being a good helper (and lots of pre-dipped strawberries too).
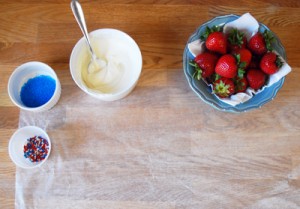
Setting Up
4th of July Chocolate Strawberries

Recipe: 4th of July Strawberries

Ingredients

  • 1+ cup White Melting Chocolate
  • 12 strawberries
  • Sprinkles of choice

Instructions

  1. Set up workspace by putting sprinkles in a small containers. Have an extra container handy. I used ramekins. Wash and dry strawberries. Lay out wax paper.
  2. Melt chocolate in a microwavable safe bowl in the microwave by slowly doing 10 second intervals and stirring until its the right consistency for dipping.
  3. Dip strawberry into chocolate, then hold over an empty bowl, shake the sprinkles onto the chocolate part. (This will help reduce the clumping in your sprinkles. ) Lay on wax paper to harden. Repeat for all. Melt more chocolate as needed.
  4. Enjoy!

Preparation time: 5 minute(s)

Cooking time: 10 minute(s)

Number of servings (yield): 12

Red, White and Blue Jell-o Blocks

Red White and Blue Jell-o Blocks

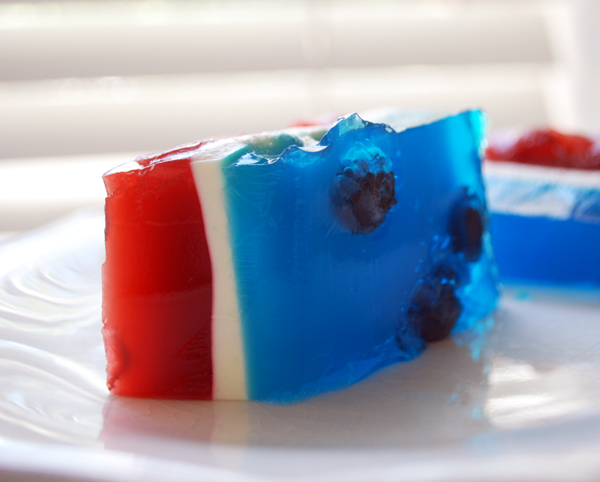
I never made a layered Jell-o dessert before, this is my first try. Since I found so many recipes on the web, I decided that YES the world needs yet another one, so I’m going to blog about it. And what a fun treat to celebrate our country’s Independence Day… a dessert you can pick up with your fingers and looks patriotic to boot!

Blue and White Jello-o Layers
This type of Jell-o treat has been around forever. But there is a reason for it.. they are fun, tasty, and they make you feel like a kid! For some reason, they always seem to be a summer treat. Maybe because they remind me of swimming, weird right? Well, they are strangely refreshing.

This is definitely a kid treat, my husband and I aren’t really overly thrilled about them, but they were fun to make with my son. I put some blueberries and strawberries in them to get a little nutritional value in them. I think they came out pretty well for my first attempt. If they don’t cut well for you, just pile them into a small glass and throw some whip cream on them. The colors still look very nice.
Red White and Blue Jell-o Blocks

To celebrate the Fourth of July, my hubby and I will most likely be packing up the car with some packed lunches, a big blanket, some homemade festive paper hats (thanks to my 3 year old), and heading over to the nearby park to have a baby crying – 3 year old’s a whining – who forgot the napkins – what am I sitting on – baby needs a diaper change! – why are we doing this, kind of “special picnic lunch”. But when we get through it, we will have the lovely memories. But honestly, I wouldn’t trade those memories for anything.

Happy Fourth of July!

Recipe: Red White and Blue Jell-o Blocks

Ingredients

  • 1 package (6 ounces) berry blue gelatin
  • 1 package (6 ounces) strawberry gelatin
  • 1 cup fresh strawberries sliced
  • 1 cup fresh blueberries
  • water
  • 1 envelope unflavored gelatin
  • 1 cup heavy whipping cream
  • 6 tablespoons sugar
  • 2 cups (16 ounces) sour cream
  • 1 tsp vanilla extract

Instructions

  1. (Prepared in a 9×13 baking dish.)
  2. Make Blue Layer: prepare according to package instructions, then add in blueberries. Refrigerate for 1 hour.
  3. Make White Layer: in a medium saucepan, sprinkle the unflavored gelatin over a 1/2 cup of cold water and let stand for 1 minute. Then, over low heat, add the whipping cream and sugar and stirring until dissolved. Let it cool. When the blue layer is done in the fridge, then whisk in your sour cream and vanilla. Spoon over the blue layer. Refrigerate for 1 hour.
  4. Make Red Layer: prepare according to package instructions, then add in strawberries. (Next time I might stick with raspberries, its easier to cut the blocks that way. Or dice the strawberries small. ) Spoon slowly over the white layer.. this is the most difficult layer because the white will sliver off if you go to fast. Refrigerate for another hour.

Preparation time: 15 minute(s)

Cooking time: 3 hour(s)

Number of servings (yield): 12

Related Posts Plugin for WordPress, Blogger...