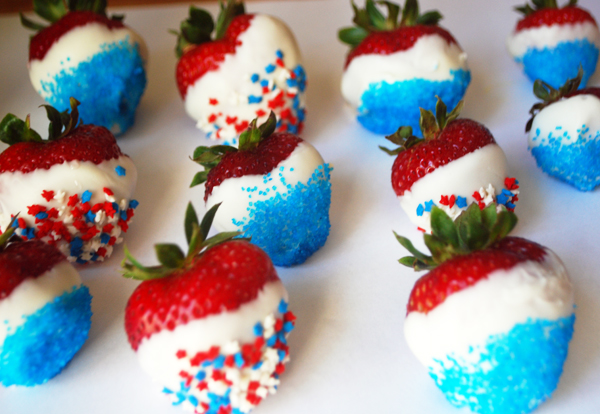
Star Spangled Strawberries

4th of July Chocolate Strawberries

If you read my last post about Jell-o, you will know that we are going on a picnic this weekend to celebrate the 4th of July. I decided last minute to add another dessert, umm… I mean fruit, to our basket. So here they are… sweet strawberries with a little patriotic flair. These were fun to make with my 3 year old, he sat there and narrated everything I was doing “Now dipping into the chocolate!” “Now dipping into the blue stuff!” “Now it goes into my mouth!” He only got one for being a good helper (and lots of pre-dipped strawberries too).
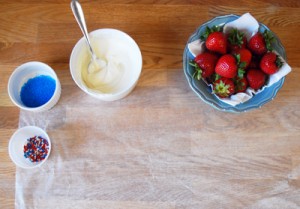
Setting Up
4th of July Chocolate Strawberries

Recipe: 4th of July Strawberries

Ingredients

  • 1+ cup White Melting Chocolate
  • 12 strawberries
  • Sprinkles of choice

Instructions

  1. Set up workspace by putting sprinkles in a small containers. Have an extra container handy. I used ramekins. Wash and dry strawberries. Lay out wax paper.
  2. Melt chocolate in a microwavable safe bowl in the microwave by slowly doing 10 second intervals and stirring until its the right consistency for dipping.
  3. Dip strawberry into chocolate, then hold over an empty bowl, shake the sprinkles onto the chocolate part. (This will help reduce the clumping in your sprinkles. ) Lay on wax paper to harden. Repeat for all. Melt more chocolate as needed.
  4. Enjoy!

Preparation time: 5 minute(s)

Cooking time: 10 minute(s)

Number of servings (yield): 12

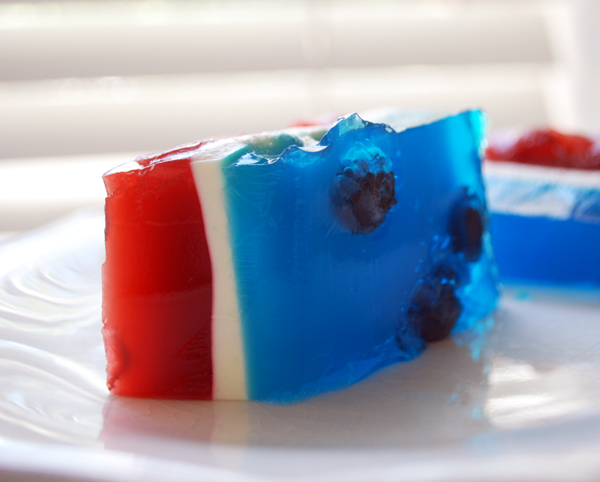
Red, White and Blue Jell-o Blocks

Red White and Blue Jell-o Blocks

I never made a layered Jell-o dessert before, this is my first try. Since I found so many recipes on the web, I decided that YES the world needs yet another one, so I’m going to blog about it. And what a fun treat to celebrate our country’s Independence Day… a dessert you can pick up with your fingers and looks patriotic to boot!
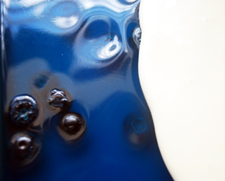
Blue and White Jello-o Layers
This type of Jell-o treat has been around forever. But there is a reason for it.. they are fun, tasty, and they make you feel like a kid! For some reason, they always seem to be a summer treat. Maybe because they remind me of swimming, weird right? Well, they are strangely refreshing.

This is definitely a kid treat, my husband and I aren’t really overly thrilled about them, but they were fun to make with my son. I put some blueberries and strawberries in them to get a little nutritional value in them. I think they came out pretty well for my first attempt. If they don’t cut well for you, just pile them into a small glass and throw some whip cream on them. The colors still look very nice.
Red White and Blue Jell-o Blocks

To celebrate the Fourth of July, my hubby and I will most likely be packing up the car with some packed lunches, a big blanket, some homemade festive paper hats (thanks to my 3 year old), and heading over to the nearby park to have a baby crying – 3 year old’s a whining – who forgot the napkins – what am I sitting on – baby needs a diaper change! – why are we doing this, kind of “special picnic lunch”. But when we get through it, we will have the lovely memories. But honestly, I wouldn’t trade those memories for anything.

Happy Fourth of July!

Recipe: Red White and Blue Jell-o Blocks

Ingredients

  • 1 package (6 ounces) berry blue gelatin
  • 1 package (6 ounces) strawberry gelatin
  • 1 cup fresh strawberries sliced
  • 1 cup fresh blueberries
  • water
  • 1 envelope unflavored gelatin
  • 1 cup heavy whipping cream
  • 6 tablespoons sugar
  • 2 cups (16 ounces) sour cream
  • 1 tsp vanilla extract

Instructions

  1. (Prepared in a 9×13 baking dish.)
  2. Make Blue Layer: prepare according to package instructions, then add in blueberries. Refrigerate for 1 hour.
  3. Make White Layer: in a medium saucepan, sprinkle the unflavored gelatin over a 1/2 cup of cold water and let stand for 1 minute. Then, over low heat, add the whipping cream and sugar and stirring until dissolved. Let it cool. When the blue layer is done in the fridge, then whisk in your sour cream and vanilla. Spoon over the blue layer. Refrigerate for 1 hour.
  4. Make Red Layer: prepare according to package instructions, then add in strawberries. (Next time I might stick with raspberries, its easier to cut the blocks that way. Or dice the strawberries small. ) Spoon slowly over the white layer.. this is the most difficult layer because the white will sliver off if you go to fast. Refrigerate for another hour.

Preparation time: 15 minute(s)

Cooking time: 3 hour(s)

Number of servings (yield): 12
Peach and Gorgonzola Chicken Pizza

Peach and Gorgonzola Chicken Pizza
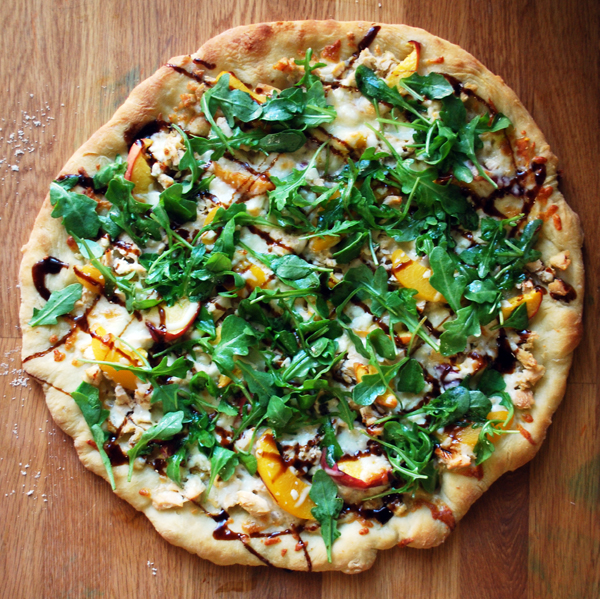
Goodbye red sauce pizzas! After having this surprisingly delicious combination of peach, cheese, and chicken pizza (a recipe by Cooking Light), I have opened my eyes to all new possible ways of enjoying a pizza pie. Having the arugula on the top was like eating your pizza and salad at the same time… and it works! I have made this 3 times in the last month, I may never tire of it.

The recipe is by Cooking Light and calls for less cheese than what I used, but I can’t help myself… I like my pizza cheesy. It also teaches you how to reduce balsamic vinegar to make a thick syrupy glaze. I actually already had a bottle of Balsamic Vinegar Glaze in my cupboard (which I had bought by mistake) and was happy to find a recipe that calls for it. But after reading the instructions, I would imagine it would be very easy and quick to make the glaze. I wouldn’t eat this pizza without it, the balsamic really adds a wonderful flavor.

If you don’t have chicken already cooked, just put the raw chicken breast into a pot of simmering (low boil) water for about 10-15 minutes, or until no longer pink in the center. Let it cool. Take a fork and pull to shred it, or to save more time… just chop it up into tiny pieces. Do this while the pizza crust is cooking in the oven.

Recipe: Peach and Gorgonzola Chicken Pizza

Peach and Gorgonzola Pizza

Ingredients

  • 1 pizza dough (I use Trader Joes)
  • 1 Tbsp olive oil
  • 1 cup shredded mozzarella cheese
  • 1 chicken breast (cooked and shredded)
  • 1/3 cup crumbled Gorgonzola cheese
  • 1 large or 2 small peaches, thinly sliced
  • 1/3 cup balsamic vinegar OR balsamic glaze
  • a handful of Arugula Lettuce

Instructions

  1. Preheat oven to 400.
  2. Roll out dough on floured surface. Transfer to prepared pizza pan or baking sheet. Brush on a little olive oil. Bake for about 10 minutes or until no longer wet looking. Remove from oven.
  3. Top pizza crust with half the mozzarella cheese, shredded chicken, peach slices, gorgonzola cheese, and then finally the last of the mozzarella.
  4. Bake for 10-12 minutes or until the crust looks a nice golden color.
  5. Meanwhile, if you are using balsamic vinegar… heat the vinegar in a small saucepan and heat on medium high for about 5 minutes. The idea is to reduce the vinegar until its a thick glaze. You can also buy this in glaze form (like I have).
  6. In a small bowl toss the arugula with very little olive oil and balsamic vinegar.
  7. When the pizza has finished baking, drizzle with the balsamic glaze. Top with arugula. Enjoy!

Preparation time: 10 minute(s)

Cooking time: 20 minute(s)

Number of servings (yield): 4 (2 slices per person)

Oatmeal Raisin Cookies

Oatmeal Raisin Cookies
Another one of my favorite “go to” recipes from Roland Mesnier’s book Dessert University. If you haven’t read my recent post on Presidential Peach Pie, I talked about who Roland Mesnier is and how much I love his book. Once this book comes off the bookshelf, I seem to go on a crazy baking spree and so here is one of his cookie recipes that never seems to fail me.

Oatmeal Raisin Cookies
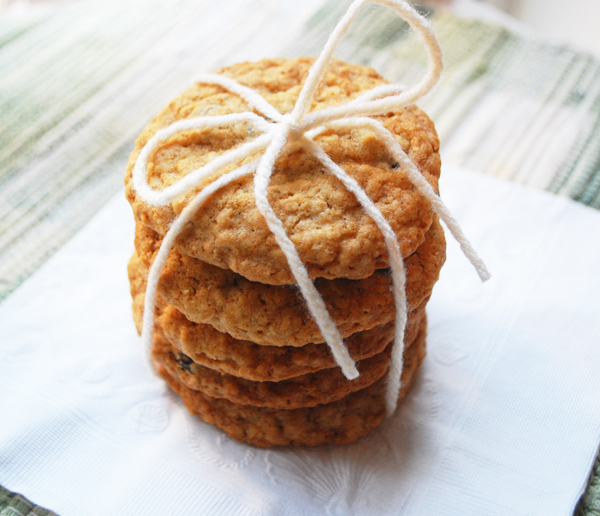
There is nothing better than cuddling up on the couch after a REALLY long and exhausting day, with a good book, a glass of milk, and a stack of these classic “oldies but goodies” oatmeal cookies. The perfect marriage of crispy and chewy, these are perfect for dipping in cold milk. I could honestly eat a dozen of them in one sitting if I didn’t stop myself!

This recipe can be altered by using any variety of dried fruit like cherries or cranberries and or chocolate chips. I have made them all sorts of ways, depending on my mood or by what’s in the cupboard. They always come out perfect, just follow the recipe exactly and keep an eye on them while baking. And ALWAYS use parchment paper, its the only way I have found to avoid the blackend bottoms. I also find that if I am baking two sheets of cookies at the same time, I will switch racks midway through baking so they bake more evenly.

I make these when I want to ship them to someone because I find they keep up well, even after a week. So even if you don’t have a big household to cook for, make the full batch size and store them in your cookie jar.


Recipe: Oatmeal Cookies

Ingredients

  • 1 1/2 cups all-purpose flour
  • 1 tsp baking soda
  • 3 cups quick-cooking (not instant) rolled oats
  • 1 cup (2 sticks) unsalted butter, softened
  • 1 cup granulated sugar
  • 1 cup packed light brown sugar
  • 2 large eggs
  • 1 Tbsp pure vanilla extract
  • 1/2 cup raisins, dried fruit, or chocolate chips (optional)

Instructions

  1. Combine flour, baking soda and oats in a medium sized bowl.
  2. In an electric mixer, cream together the butter and the sugars until smooth.
  3. Beat in the eggs and vanilla.
  4. Stir in the flour and oat mixture.
  5. Finally, stir in the raisins.
  6. Refrigerate the dough for 1 hour.
  7. Preheat the oven to 375. Line sheets with parchment paper.
  8. Make dough balls and place them on the baking sheet. Flatten with the palm of your hands.
  9. Bake for 12-15 minutes, or until golden. Cool on a wire rack.
  10. Store in an airtight container.

Preparation time: 1 hour(s) 30 minute(s)

Cooking time: 30 minute(s)

Number of servings (yield): 65 cookies

Related Posts Plugin for WordPress, Blogger...