
My hubby is celebrating his 35th birthday this year, the 10th one that we have celebrated together! Thinking back, I have made various cakes or desserts for him and sometimes we just went out to a nice restaurant… but I really haven’t done anything memorable. So this year I wanted to actually create a cake specially for him.
My husband isn’t a picky eater by any means, he always eats what I make for him and when I ask what he thinks, his response ranges from a “Eh” grunt, to “its ok”, and on rare occasions I get the very firm “its a keeper”. I know its really bad when he leaves his seat to fetch his mom’s homemade hot chili sauce. What I’m trying to say is that although not a picky eater, he definitely knows what he likes. When it comes to desserts I know exactly what his favorite things are, and I put them all together to make this cake.

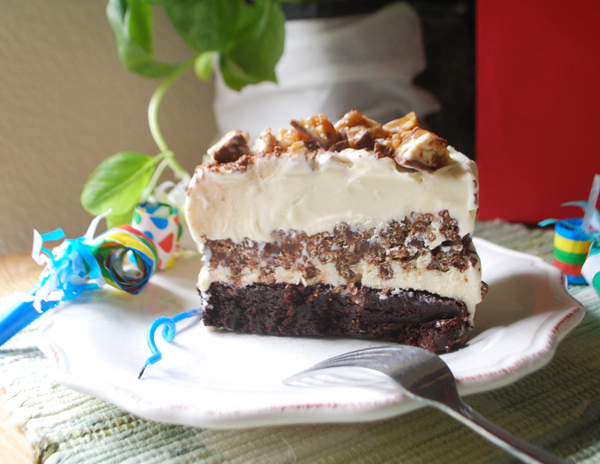
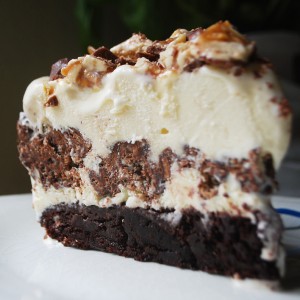
Layer 1: Had to be brownies, dark chocolate variety. I know because the few times when we have gone a to a buffet, he is always excited to end the meal with frozen yogurt over a brownie. I used Trader Joe’s Guilt Free brownies, they only require 1 cup yogurt, and bakes in 20 minutes.
Layer 2 & 4: Had to be Vanilla Ice Cream, ONLY the kind from Costco… Kirkland Signature Super Premium Vanilla Ice Cream.
Layer 3: Had to be nutella, he got hooked on this stuff when we lived in Switzerland for a year (one of our more adventurous “before kids” move.) This was turned into a crispy layer using a crispy rice cereal.
Layer 5: Snickers, his favorite candy bar.
The end result is something I like to call Snick-a-tella ice cream cake. Wow is it delicious! When my husband took a bite, he declared his love for this new creation and told me he wants this to be his official birthday cake. It lasted us a full week and every night, after the kids went to bed, we looked forward to grabbing another slice from the freezer. I’m so sad its gone.
Note – I have to admit, the rice crispy nutella middle was so easy to bite through and had a lovely crunchy texture, but it was oddly difficult to fork. I think adding more cereal to the mix might make this easier.
Recipe: Snick-a-tella Ice Cream Cake
Summary: Snickers and Nutella are the highlights of this cool creamy dessert.

Ingredients
- 1 prepared pan of Brownies (in a 9″ spring form pan)
- 1 half gallon Vanilla Ice Cream
- 1/2 cup Nutella
- 2+ cups Rice Crispies Cereal
- 4 1 oz cubes semi-sweet baking chocolate
- 4 Tbsp Unsalted Butter
- 2 Snickers Bars
Instructions
- In a springform pan, bake 1 package of brownies. Let Cool.
- Set the container of Vanilla Ice Cream sit out at room temperature. You can speed this process up by using the warm function in the microwave.
- Scoop out the ice cream into a large bowl. Stir. Should be a nice easy consistency for spreading (still thick but soft).
- Stick pieces of parchment paper along the sides of the brownie pan.
- Spread HALF the ice cream onto the brownie layer. Freeze for about 30 minutes, or until hardened. Keep the remaining ice cream in the freezer or refrigerator.
- Meanwhile, in a microwavable bowl, melt the cubes of chocolate per package directions. Stir in the butter, nutella and then the crispy cereal.
- When ice cream layer is hardened, spread the nutella mixture on top of it. Then re-stir and spread the other half of ice cream.
- Chop up the snickers bars into small chunks. Sprinkle on top the cake. Freeze for about 5 hours.
Preparation time: 1 hour(s)

Hey there, you didn’t mention what to do with the butter? I made this a few days ago and melted it with the chocolate…is that what I was supposed to do?
Yes, Mimi, and sorry that I hadn’t mentioned that in the directions. I have made a new version of the cake this past year (http://www.cakestudent.com/snick-a-tella-ice-cream-cake-ii/) if you are interested, I hope you enjoyed the cake? Thanks for letting me know the error.
You’re welcome. And yes, I came across the new version of this cake first, and then I found this one and decided to try it because I didn’t have any dulce de leche. I loved the cake and I will be posting it on my blog soon 🙂
Yay! Looking forward to it Mimi! Your blog is wonderful btw, so glad you stopped by.
Heres my finished post! 🙂 http://culinaryxcouture.blogspot.com/2012/08/snick-tella-ice-cream-cake.html
Looks delicious.. I can hardly wait for next year when I make it again for my husband! So glad you enjoyed it 🙂