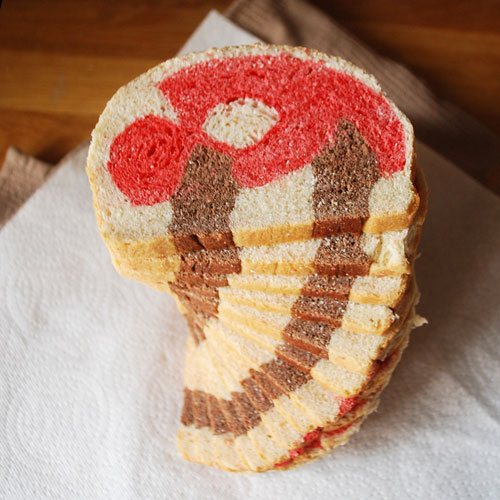
I Saw a Ship a Sailing

Apple Ship Appetizer I saw a ship a-sailing,
 A-sailing on the sea; 
And oh, it was all laden
 With pretty things for thee!

There were comfits in the cabin,
 And apples in the hold;
 The sails were made of silk,
 And the masts were made of gold.

The four and twenty sailors,
 That stood between the decks, 
Were four and twenty white mice, 
With chains about their necks.

The captain was a duck,
 With a packet on his back;
 And when the ship began to move, The captain said, “Quack, Quack!”
– Mother Goose

Continue reading

Nutella Waffles with Peaches ‘n’ Cream

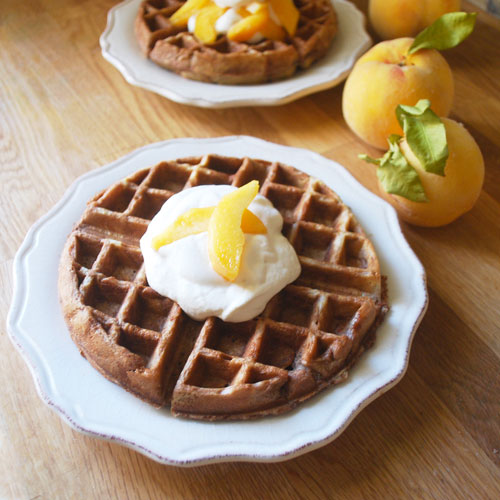
Nutella Waffles with Peaches n Cream This was the most unplanned, easy, and delicious breakfast I may have ever made. My son asked for waffles on a Sunday morning, so I heated up the waffle iron, pulled out the Bisquick, and started to whip up the waffle batter when I saw the nutella sitting out on the counter from the night before (hubby likes it in his ice cream).
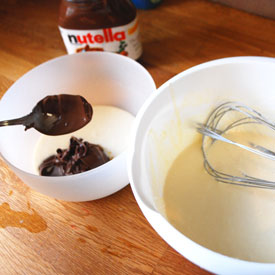
Mix nutella into batter Nutella Waffles with Peaches n Cream I decided why not swirl some chocolaty goodness into my mix and see if I can’t get a marble looking waffle. Well, the marble thing didn’t really come out so well, I probably mixed too much, but really it isn’t necessary, the taste was so good these waffles didn’t last long enough for anyone to admire the swirls. They were sweet but not at all overly sweet… they don’t need syrup and could be served for breakfast or dessert.

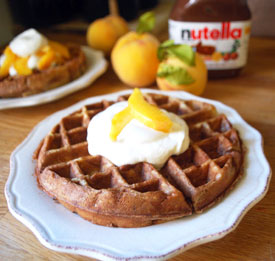
Then I noticed those beautiful peaches in the fruit bowl that our friends had thoughtfully picked from their own peach tree and brought over for us. So, I sliced a few of those, next, whipped up the last of the whipping cream in the fridge with some brown sugar so the peaches had something fluffy to sit on. The result… oh. my. gosh. It was one of those dishes where you want to eat so much your stomach hurts because your taste buds can’t get enough.

Recipe: Nutella Waffles with Peaches n Cream

Ingredients

  • 1 batch of waffle batter (made per package instructions)
  • 1/3 cup nutella
  • 1 cup heavy whipping cream
  • 1 TBSP brown sugar
  • 1 peach

Instructions

  1. Heat up the waffle iron.
  2. Mix the nutella in the waffle batter. Make your waffles. Note- I spray my iron before each waffle, otherwise it sticks. I also use setting 3, or medium. If you want to try marble, take a cup of the batter and mix the nutella with it in a separate bowl, then stir it back into the big batter mix slightly.
  3. In your electronic mixer, using the wire attachment, whip up the whipping cream until soft peaks form (about 5 minutes). Add the brown sugar, whip for a few more seconds.
  4. Serve the waffles with the cream and peach slices.

Preparation time: 10 minute(s)

Cooking time: 10 minute(s)

Number of servings (yield): 4

Lightning McQueen Race Car Bread

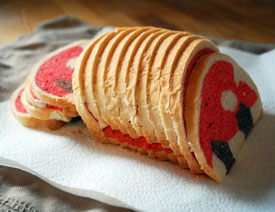
Race Car Bread Loaf You may have heard of Panda Bread, the Japanese white bread made with matcha “green tea” powder and cocoa powder shaped to resemble a panda bear? If not, check out this Taste for Adventure, they have a great tutorial for this adorable looking bread. (It’s where I got the recipe for this too.)

Well, panda bear bread has been on my to do list for some time now, so what better time to do it than to give my son a special sandwich for his first day of preschool? Race Car Bread Loaf Race Car Bread Loaf
I can’t believe my baby is going to school, where did the time go? I’m getting teary eyed just thinking about it. To make his first packed lunch a special one, I wanted something really awesome, something he can show off to the other kids, maybe a conversation starter for him, or at the very least something that will make him smile.

So I told my 3 year old that I was going to make panda bread for him. He told me nooooooo, he didn’t want panda bear bread. He said he wanted Lightning McQueen bread. Why not panda bread? Because he wanted to be super fast of course! So, race car bread it was. It was time consuming, but fun, kind of like the adult equivalent of play dough time. I thought it came out pretty well, and even though its not quite clear that its Lightning McQueen, to my 3 year old its the coolest bread ever.

To see step by step instructions on how to make this bread and many other examples of bread art, check out my new eBook!

$5   Bread Art – Playing With Dough

ebook with instant download in PDF format
Buy Bread Art - Playing with Dough ebook

Recipe: Race Car Bread

Summary: variation of the popular panda bear bread

Ingredients

  • 3 cups all-purpose flour
  • 2 1/2 TBSP sugar
  • 1 cup milk w/ 1 egg yolk (total or 1 cup together)
  • 1 1/2 tsp salt
  • 1 1/2 TBSP unsalted butter, softened
  • 2 1/4 tsp active dry yeast (1 packet)
  • red food coloring
  • 4 tsp cocoa powder mixed in 2 tsp hot water

Instructions

  1. Heat the milk with the egg yolk in the microwave for 30 seconds.
  2. Add everything to the bread machine (except the cocoa powder and food coloring). Set and start the dough setting.
  3. When its over, pull out the dough, separate into 3 balls. The white and red I made equal, the black for the wheels was smaller. Use your judgment.
  4. Now mix the cocoa powder with water to become a paste. Knead into one dough ball. Knead for about 10 minutes, you can do this in your food mixer with the hook attachment or do by hand (your arms will hurt!). But knead until its evenly colored. Do this for the red ball as well.
  5. Cover all 3 balls with greased plastic wrap and also a kitchen towel for another 40 minutes until it rises again.
  6. now use your rolling pin and your imagination to create all the pieces. Follow my photos to see how I did mine. When finished, place into the bread loaf and cover again with the plastic wrap, kitchen towel. Place into microwave oven or in an enclosed area. Let rise for another hour.
  7. Preheat oven to 350. Bake for 30 minutes. Cool then Slice.

Preparation time: 3 hour(s)

Cooking time: 30 minute(s)

Number of servings (yield): 8
Roti

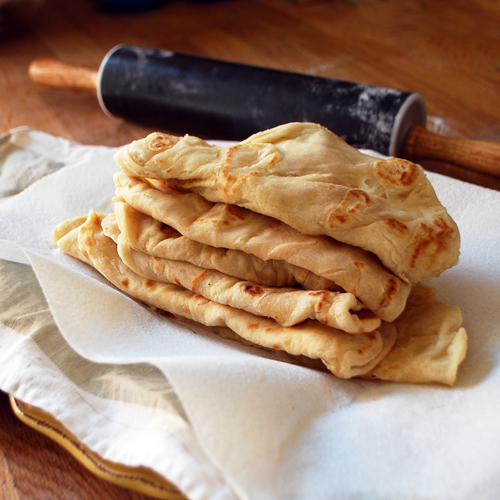
Stack of Fresh Roti
Roti Step by Step Instructions Fresh soft and delicious roti (“rho-tee”), a bread accompaniment for various spicy Indian curries and sweet puddings (see my last post of Halwa pudding). This roti bread was taught to me by my mother in law, shown to me, not given a written recipe with measurements (I wonder if she even owns measuring cups!), oh no no… mom eyeballs the amounts and can tell by the texture if its the right amount. She does everything by heart and with heart. Mom has been making this for years and is probably finding this post rather amusing!

This particular way of making Roti results in a very soft and pliable bread, so its great for using in lieu of a spoon. Since I didn’t grow up eating roti and curries, I have had to practice this recipe over and over again and record my measurements. My husband thinks I finally got it right. So here it is…

Recipe: Roti

Summary: Guyanese Style

Ingredients

  • 2 cups All-purpose flour
  • 1 TBSP Baking Powder
  • 1 cup water
  • dash of salt
  • vegetable oil for brushing (about 1/4 cup)

Instructions

  1. Mix the dry ingredients together in a large bowl. Add water slowly and roll the flour onto the water to avoid your fingers sticking too much. Mix with your hands until its all combined and slightly sticky. Keep kneading away at it for a few minutes.
  2. Add a little extra flour to the bowl and roll the dough ball to make it nice and soft. Leave in the bowl and cover with a damp towel for at least 30 to 45 minutes.
  3. Break the dough into golf ball sized pieces (I usually make about 7).
  4. Now look at my pictures to help you… take a ball and:
    – roll it out (try to use as little flour as possible, more flour = tougher bread)
    – brush top side with a little oil
    – fold “brochure like” with each side toward the middle. Next, fold the same way but with the bottom up, then top down. You should have a little folded square (oiled side tucked inside, soft on outside).
    – repeat this for all balls.
    – Let them sit another 30 minutes.
  5. Prepare your workspace by spreading out a kitchen towel onto the counter. Place a paper towel onto that. (This is where you will be “smushing” the roti.)
  6. Heat a skillet to medium high, brush with oil. Now roll out a ball dough into a round circle. Toss the roti on the skillet, wait for it to bubble (1-2 minutes), brush the top with oil then flip it. Brush the new top with oil (the already cooked side) and flip again. Wait about 10 seconds then remove from the skillet and place onto the prepared paper towel. Fold the towel in half, then hold accordion like and smush together several times (like 20 times). Roti should be soft and floppy. Place on a plate and cover to keep warm. Repeat for all.

Preparation/Rising time: 60 minute(s)

Cooking time: 15 minute(s)

Number of servings (yield): 7

Related Posts Plugin for WordPress, Blogger...